I was never really happy with the light in my kitchen (which doubles as my workshop) since I moved in. I had installed a Philips Hue White Ambience Runner 3 but the integrated spots had a horrible light output. I never wanted to leave the Philips Hue ecosystem, since I really liked the Apple HomeKit integration, but it started to bother me more and more.
One Saturday evening, 1h before shops closed, I was missing a threaded rod for another project and drove to my nearest hardware store with one of my best friends and stumbled over the Paulmann URail System which looked promising. We decided to go with it and a quick trip for ~2,00€ in threaded rods escalated to the following inital BOM:
| Item | Qty | Hornbach Price |
|---|---|---|
| URail 2m | 1 | 31.80EUR |
| URail 1m | 1 | 16.95EUR |
| URail 0.5m | 1 | 10.40EUR |
| URail Line Connector | 2 | 9.25EUR |
| URail Power Supply | 1 | 20.85EUR |
| URail Zigbee Dimm/Switch | 1 | 40.00EUR |
| URail Spot Tubo | 6 | 20.35EUR |
| Total | 260.60EUR |
To my surprise, the pricing at my local hardware store was pretty competitive and significantly underperformed the vendors pricing. The hardware store offered some starter kit bundles, which may make things easier, but come with a convenience tax and would only offer 1m segments which would require more joints which I wanted to avoid.
Installation
Installation was pretty straight forward. We used a line laser to project a good line on the ceiling and worked our way forward, starting with the power supply, followed by the ZigBee Dimm/Switch and all of the URail segments.

The Urail segments offer plenty of mounting holes. You don’t need to use them all, for the 2m segment with 4 Spots mounted, 3 screws hold everything up without any bending.
The last 0.5m segment seemed visually too close to the curtains, so we decided to cut it to length on my Bosch GCM 8 SJL Miter Saw which worked flawlessly.
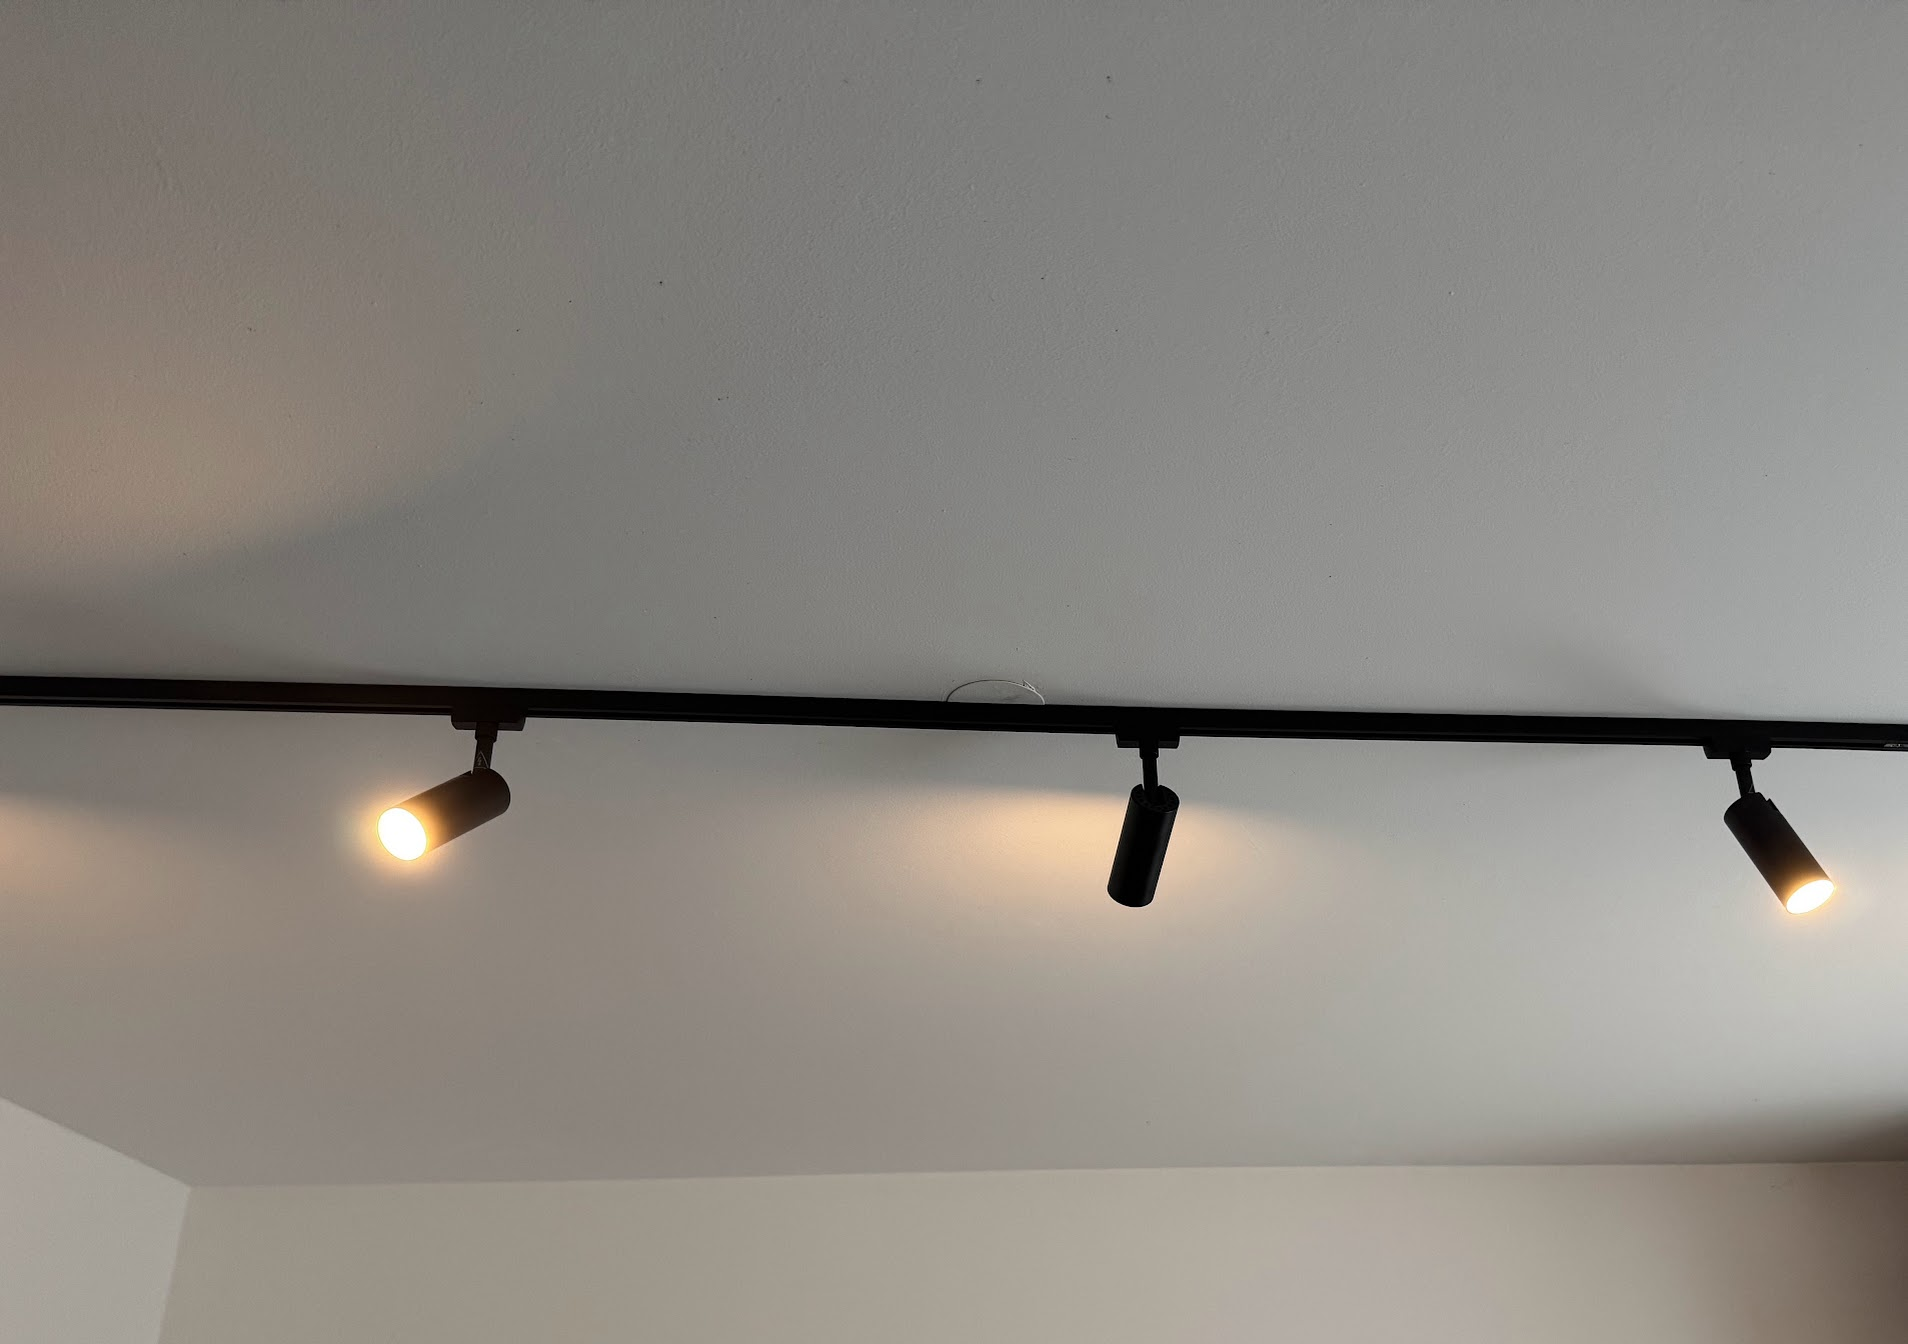
Light output
The Spot Tubo seemed pretty dim when installing in daylight, but after the sun had set, everything was looking perfect. More than enough light for the workshop mode of my kitchen. But a bit too much light for a cozy dinner.
It’s an LED, so let’s just reduce the brightness, easy, right?
After I had implemented Zigbee, which I’ll outline in the next chapter, I tried to dimm the lights only to find out that it wasn’t supported. Since the URail system is a 230V system, each spot needs to implement dimming following a signal from the Zigbee controller and the 969.17 version of the Spot Tubo doesn’t support dimming. There is a 3-Step Dimm Version of the Spot Tubo which I acquired from Metro Marketplace shipped directly from the vendor, adding 30.00EUR to the total.
Zigbee and HomeKit integration
My household is an Apple household, so I needed a working HomeKit integration. Paulmann has a Smart Home Zigbee Gateway called Smik which doesn’t have a HomeKit integration, so I had to build my own.
I bought a Sonoff Zigbee 3.0 USB Dongle and attached it to my homeserver. Using kvm I passed the USB device to my docker VM and installed a zigbee2mqtt docker container with the following docker-compose.yml:
version: '3.8'
services:
    mqtt:
        image: eclipse-mosquitto:2.0
        restart: unless-stopped
        volumes:
            - './mosquitto-data:/mosquitto'
        ports:
            - '127.0.0.1:1883:1883'
            - '9001:9001'
        command: 'mosquitto -c /mosquitto-no-auth.conf'

    zigbee2mqtt:
        container_name: zigbee2mqtt
        restart: unless-stopped
        image: koenkk/zigbee2mqtt
        volumes:
            - ./data:/app/data
            - /run/udev:/run/udev:ro
        ports:
            - 8080:8080
        environment:
            - TZ=Europe/Berlin
        devices:
            - /dev/ttyUSB0:/dev/ttyUSB0
Additionally, I had to configure zigbee2mqtt in data/configuration.yaml:
version: 4
mqtt:
  base_topic: zigbee2mqtt
  server: mqtt://mqtt
serial:
  port: /dev/ttyUSB0
  adapter: zstack
advanced:
  channel: 11
  network_key: GENERATE
  pan_id: GENERATE
  ext_pan_id: GENERATE
frontend:
  enabled: true
homeassistant:
  enabled: false
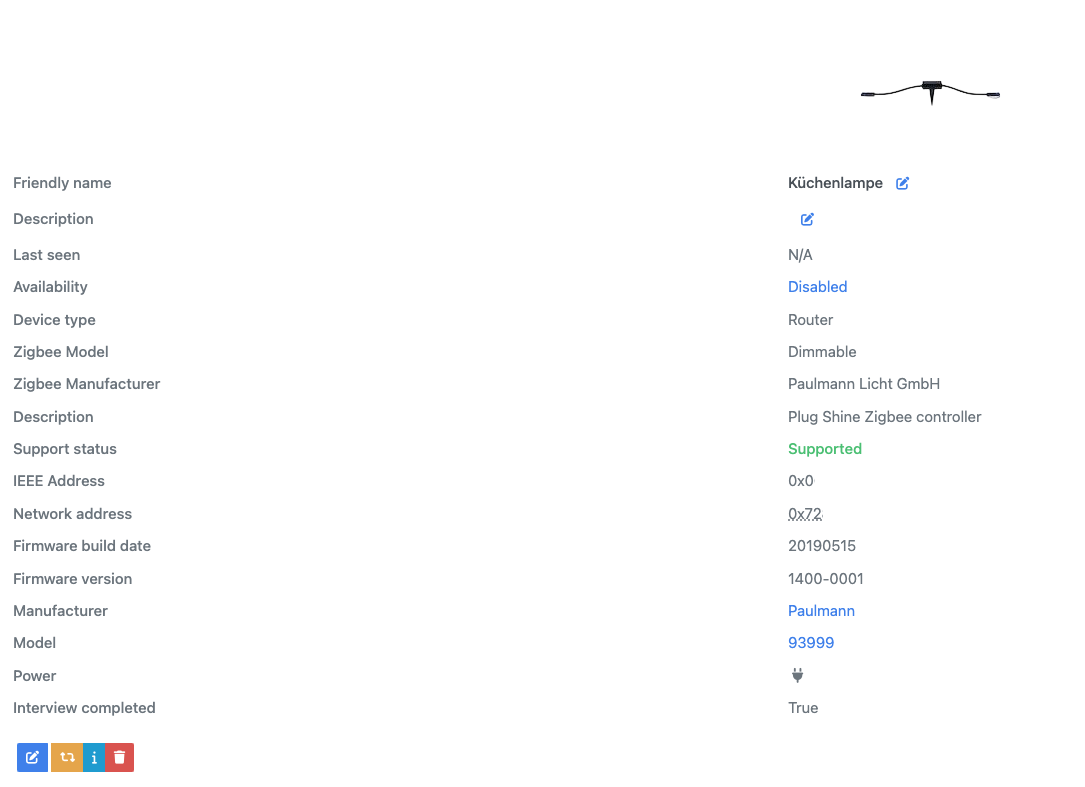
Pairing the Zigbee Dimm/Switch
The Zigbee Dimm/Switch documentation doesn’t give a lot of details about the Zigbee side of things. I found another smart lamp from Paulmann which required 5 quick on/off power cycles to get into pairing mode. Luckily this also works for the Zigbee Dimm/Switch.
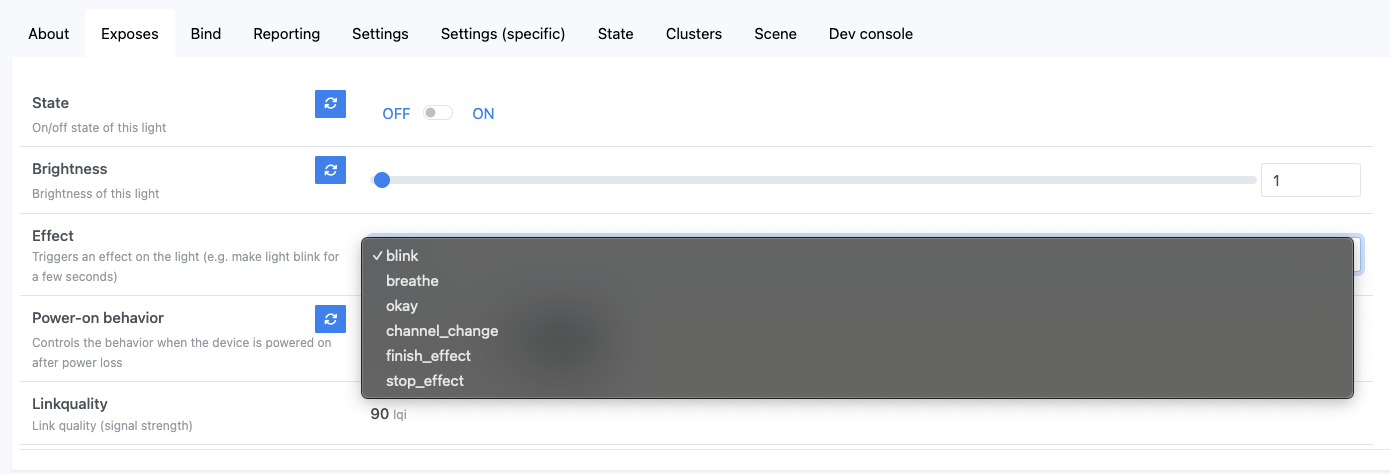
The Dimm/Switch exposes a linear brightness scale, rather than 3 brightness states as claimed by the Spot Tubo. You can definitely have more than 3 levels of brightness, more on that in the dimming section. For now, I’m going with 25%, 50% and 100% as my daily drivers.
The Zigbee Dimm/Switch also exposes some effects, which also produce a corresponding output on the lights:
HomeKit
I’m already running Homebridge on the same docker host to bring other smart devices into HomeKit. Adding the lamps to Homebridge and thus Homekit was as easy as installing the homebridge-z2m plugin. No further configuration required.
Dimming
According to the name, the 3-Step Dimm Tubo Spot supports 3 dimming modes, which seemed kind of arbitrary to me and didn’t align with my perception. I ran the following small test series by increasing the brightness in 10% gradients.
| % Brightness | Observation |
|---|---|
| 10% | lowest light output, annoying flickering |
| 15% | gradual increase, no more flickering |
| 20% | noticeable increase |
| 30% | minimal increase |
| 40% | minimal increase |
| 50% | no visible increase |
| 60% | no visible increase |
| 70% | minimal visible increase |
| 80% | no visible increase |
| 90% | no visible increase |
| 100% | minimal visible increase |
You can clearly see the steps the light goes through when fading from 0 to 100%, which admittedly isn’t the nicest thing to watch compared to a smooth fade, but completely tolerable.
The Settings (Specific) Section of zigbee2mqtt for the device offers a transiton setting:
Transition Controls the transition time (in seconds) of on/off, brightness, color temperature (if applicable) and color (if applicable) changes. Defaults to
0(no transition).
Changing the value to 0 subjectively leads to a more enjoyable on-off transition behavior for me.
Conclusion
I now have a bright light for my kitchen, that seemlessly integrates with Apple HomeKit and is dimmable for what I believe is a fairly reasonable price. For now, I couldn’t be happier.
Here’s the final BOM:
| Item | Qty | Price |
|---|---|---|
| URail 2m | 1 | 31.80EUR |
| URail 1m | 1 | 16.95EUR |
| URail 0.5m | 1 | 10.40EUR |
| URail Line Connector | 2 | 9.25EUR |
| URail Power Supply | 1 | 20.85EUR |
| URail Zigbee Dimm/Switch | 1 | 40.00EUR |
| URail Spot Tubo | 6 | 25.01EUR |
| SONOFF Zigbee 3.0 USB Dongle | 1 | 29.74EUR |
| Total | 309.05EUR |
A big shoutout to my friend Dritter for nagging me for 4 years to fix my kitchen light and pulling through when I finally caved.